Setting Up an IDE – Integrated Development Environment for C Programming
Introduction
Hello there, future C programmer! If you’re reading this, you’re probably ready to dive into the world of C programming. But before you start writing code, you need a comfortable, efficient place to do it. That’s where an Integrated Development Environment (IDE) comes in. This tutorial will guide you through the process of setting up an IDE for C programming. Ready? Let’s get started!
Table of Contents
Understanding IDE for C Programming
First things first, what’s an IDE? An Integrated Development Environment is a software application that provides a comfortable space for programmers to write, compile, and debug their code. It’s like your personal coding toolbox, packed with features like text editors, compilers, and debuggers. In the context of C programming, an IDE can make your coding journey smoother and more efficient.
Choosing the Right IDE for C Programming
There are several IDEs available for C programming, each with its own strengths. Some popular ones include Code::Blocks, Eclipse, and Visual Studio Code. When choosing an IDE, consider factors like ease of use, features, and community support. Remember, the best IDE is the one that suits your needs and feels comfortable to you.
Setting Up Your IDE
Now, let’s get to the meat of the matter: setting up your IDE. While the exact steps can vary depending on the IDE, the general process is similar:
- Download and Install: Visit the official website of your chosen IDE and download the installer. Run the installer and follow the prompts to install the IDE on your system.
- Configure: After installation, you may need to configure the IDE according to your preferences. This could involve setting the theme, layout, and keyboard shortcuts, among other things.
- Install a C Compiler: Most IDEs will require you to install a C compiler. The compiler is what turns your C code into an executable program. Some popular C compilers include GCC and Clang.
- Create a New Project: Once your IDE is set up, you can create a new C project and start coding!
Setting Up Code::Blocks IDE for C Programming
Code::Blocks is a free C, C++ and Fortran IDE built to meet the most demanding needs of its users. It is designed to be very extensible and fully configurable. Here’s how you can set it up for C programming:
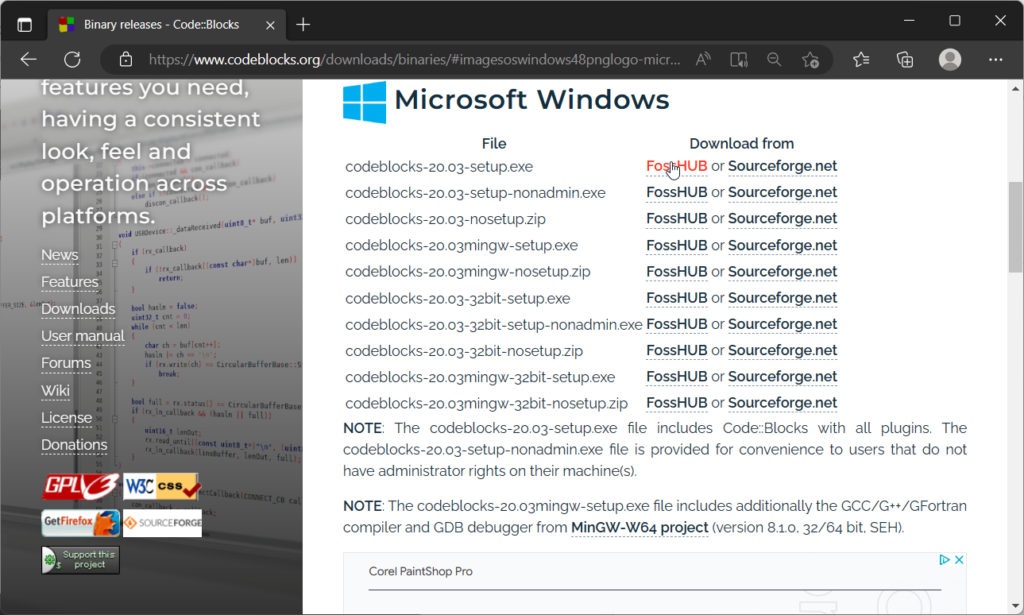
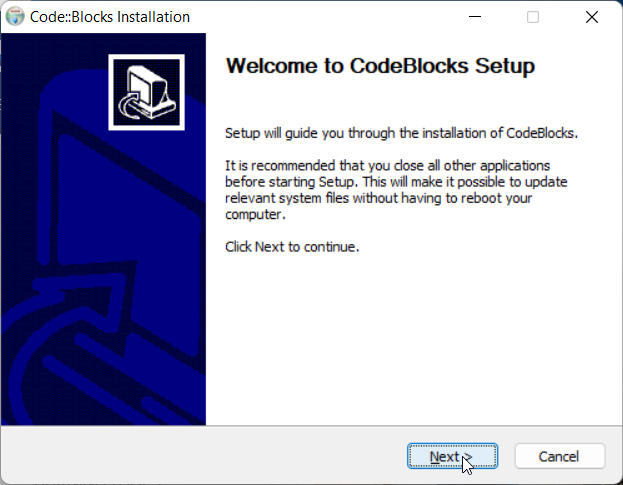
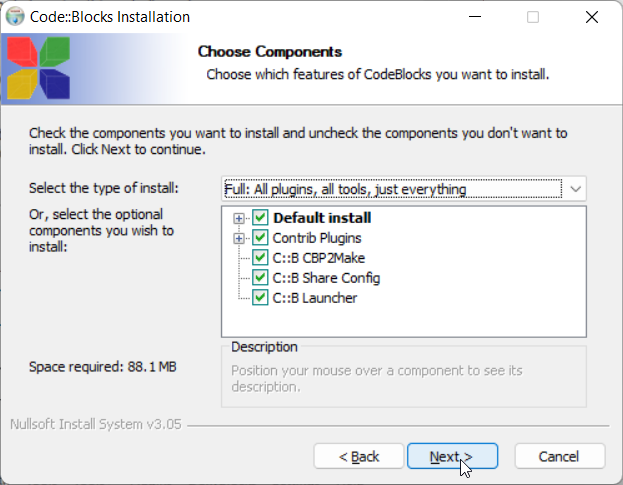
- Download and Install Code::Blocks: Visit the official Code::Blocks download page and download the binary release suitable for your operating system. If you’re on Windows, it’s recommended to download the version with mingw-setup (e.g., codeblocks-XX.XXmingw-setup.exe). This version comes with a pre-built version of the GCC compiler. Run the installer and follow the prompts to install Code::Blocks on your system.


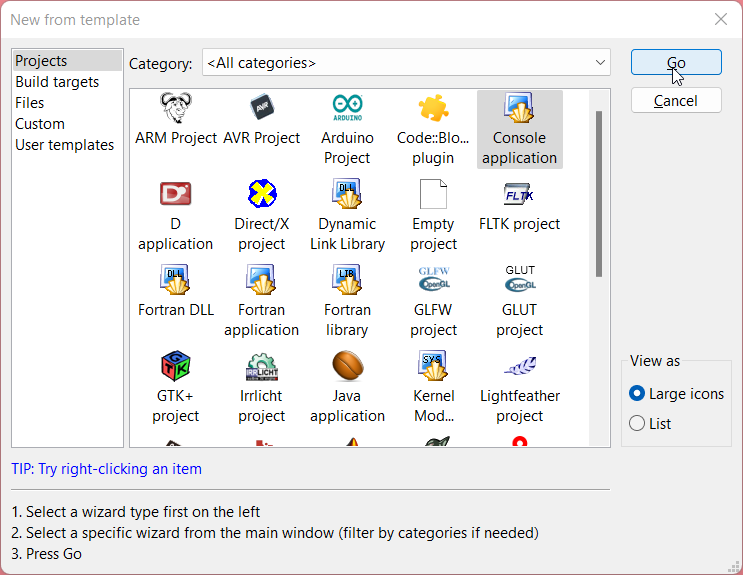
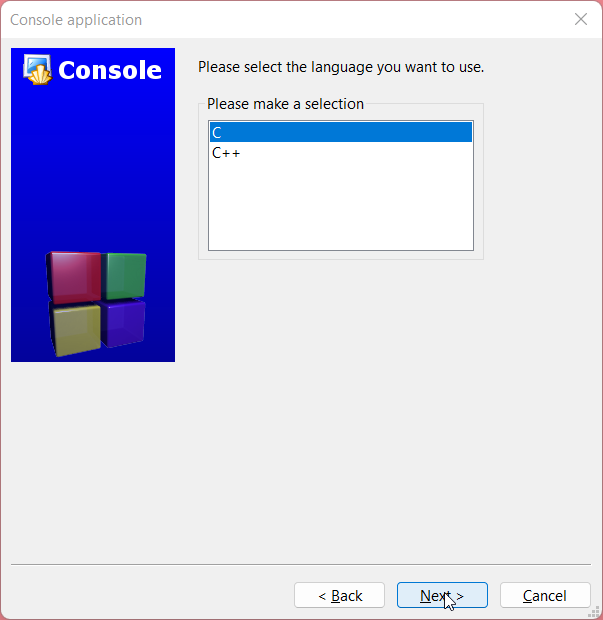
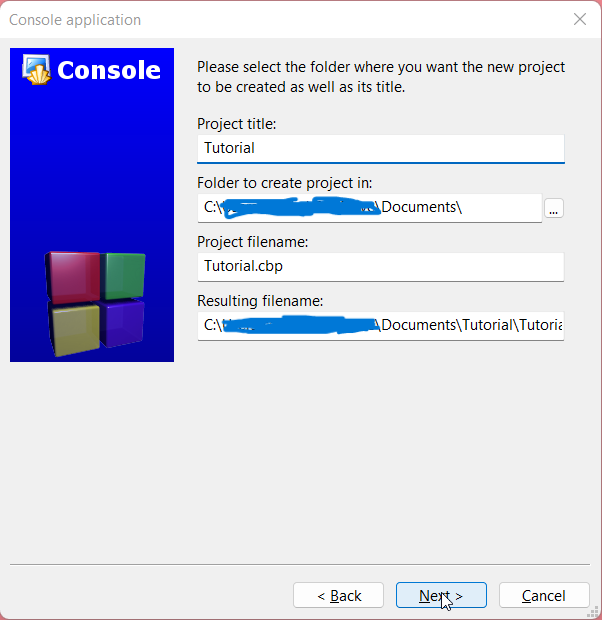
- Create a New C Project: Open Code::Blocks and go to File > New > Project. Select “Console application”, click “Go”, then “Next”. Select C as the language, give your project a name and choose a location to save it, then click “Finish”.


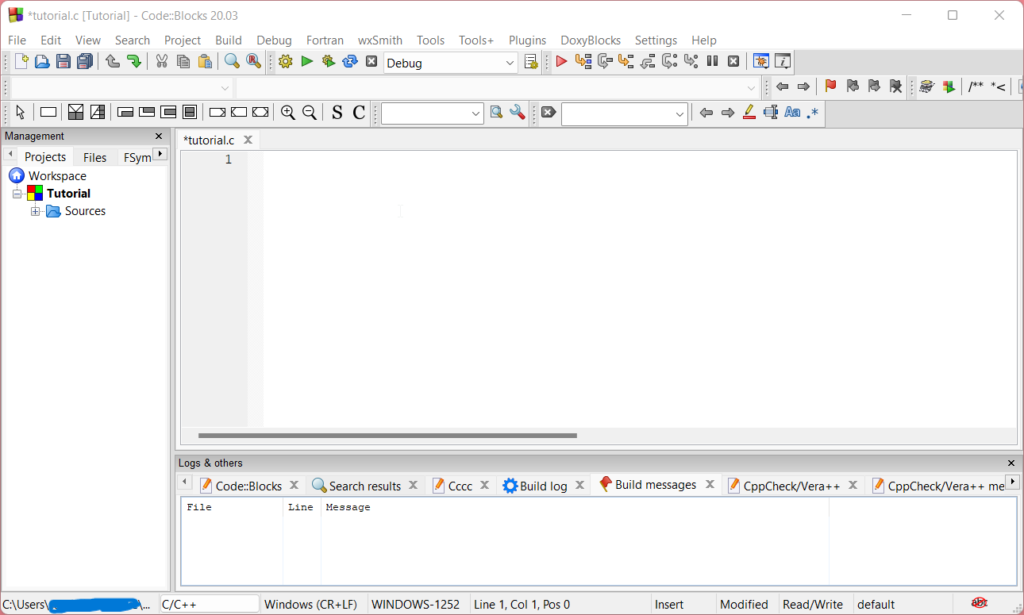
- Create a New C File: In your project, right-click on the “Sources” folder, then go to New > Empty file. Give your file a name with a
.cextension.


- Write Your Code: You can now start writing your C code in the file you created.
Here’s an example of a simple “Hello, World!” program:
#include <stdio.h>

int main() {
   // printf() displays the string inside quotation
   printf("Hello, World!");
   return 0;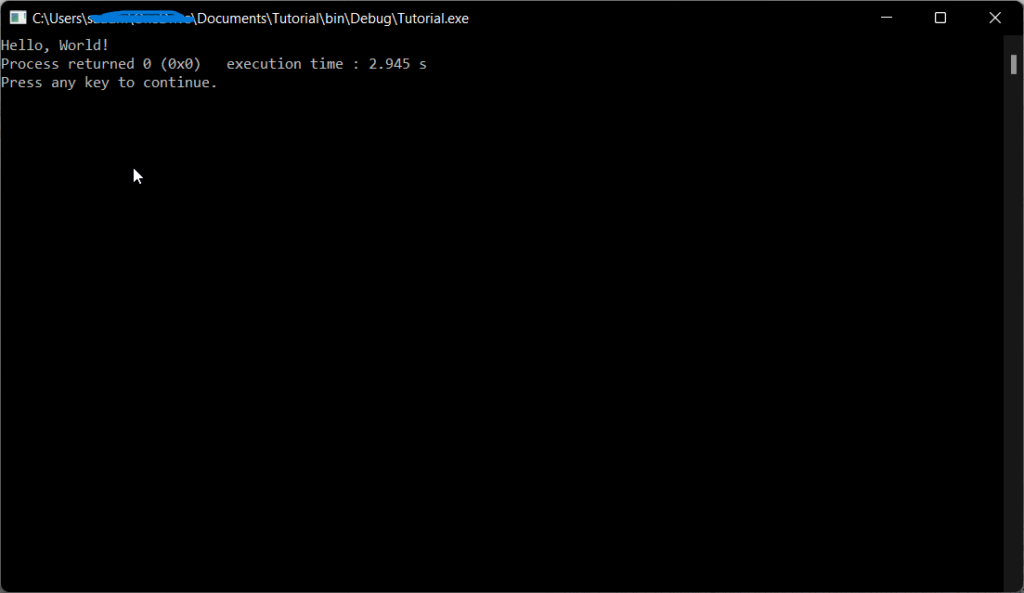
}- Compile and Run Your Program: To compile your program, click on the “Build” icon (or press
Ctrl+F9). To run your program, click on the “Run” icon (or pressCtrl+F10).


And that’s it! You’ve set up Code::Blocks for C programming. Happy coding!
Setting Up Visual Studio Code for C Programming
Visual Studio Code (VS Code) is a popular IDE that supports a multitude of programming languages, including C. Here’s how you can set it up for C programming:
- Download and Install Visual Studio Code: Visit the official Visual Studio Code website and download the version suitable for your operating system. Run the installer and follow the prompts to install VS Code on your system.


- Install the C/C++ Extension: VS Code uses extensions to add language support. For C programming, you’ll need the C/C++ extension developed by Microsoft. To install it, open VS Code and click on the Extensions view icon on the Sidebar (or press
Ctrl+Shift+X). Search for ‘c++’ and click on the install button for “C/C++” by Microsoft.


- Install a C Compiler: You’ll need a C compiler to compile your C programs. If you’re on Windows, you can use MinGW. For macOS, you can use the Xcode Command Line Tools, and for Linux, you can use GCC. Download and install the appropriate compiler for your system. Check out here for further instructions
- Configure the Compiler Path: VS Code needs to know the path to the compiler. Open VS Code settings (File > Preferences > Settings or
Ctrl+,), search for “C_Cpp.default.compilerPath”. In the edit box, enter the path to your compiler executable. For example, if you’re using GCC, the path would be “/usr/bin/gcc”.

- Create a New C File: Now you’re ready to start coding! Go to File > New File (or press
Ctrl+N), and save the new file with a.cextension.
Here’s an example of a simple “Hello, World!” program:
#include <stdio.h>

int main() {
   // printf() displays the string inside quotation
   printf("Hello, World!");
   return 0;
}- Compile and Run Your Program: To compile your program, open the terminal in VS Code (Terminal > New Terminal or
Ctrl+), navigate to the folder containing your C file, and use the commandgcc filename.c -o outputfileto compile. To run your program, use the command./outputfile.
And voila! You’ve set up Visual Studio Code for C programming. Happy coding!
Setting Up Eclipse for C Programming
Eclipse is another widely used IDE that supports various programming languages, including C. Here’s how you can set it up for C programming:
- Download and Install Eclipse: Visit the official Eclipse downloads page and download the Eclipse Installer. Run the installer, select “Eclipse IDE for C/C++ Developers” and follow the prompts to install Eclipse on your system.
- Set Up a New C Project: Open Eclipse and go to File > New > C Project. Enter a project name, select a project type (if you’re unsure, “Hello World ANSI C Project” is a good starting point), and click “Finish”.
- Install a C Compiler: Similar to VS Code, you’ll need a C compiler. The process is the same: Windows users can use MinGW, macOS users can use Xcode Command Line Tools, and Linux users can use GCC. Install the appropriate compiler for your system.
- Configure the Build Path: Eclipse needs to know the path to the compiler. Go to Window > Preferences > C/C++ > Build > Environment. Click on “Add…” and enter “PATH” as the name and the path to your compiler as the value.
- Create a New C File: In your project, go to New > Source File, and save the new file with a
.cextension.
Here’s an example of a simple “Hello, World!” program:
#include <stdio.h>

int main() {
   // printf() displays the string inside quotation
   printf("Hello, World!");
   return 0;
}- Compile and Run Your Program: To compile your program, right-click on your project and select Build Project. To run your program, right-click on your project, select Run As and then C/C++ Local Application.
And there you have it! You’ve set up Eclipse for C programming. Enjoy your coding journey!
C Programming Environment
Your C programming environment is the setup where you write, compile, and debug your C code. It includes your IDE, compiler, and any other tools you use for C programming. Setting up a good programming environment can make your coding more efficient and enjoyable.
C Programming Tools
In addition to your IDE and compiler, there are other tools that can assist you in C programming. These include code libraries, build automation tools, and version control systems. Many of these tools can be integrated into your IDE, making them easy to access and use.
Troubleshooting Common Issues
Setting up an IDE can sometimes come with hiccups. If you encounter issues, don’t panic! Most problems have solutions available online. A quick search with the error message often leads to a solution. Remember, every programmer faces challenges. It’s all part of the journey!
Wrapping Up
And there you have it! You’re now equipped with the knowledge to set up your own IDE for C programming. Remember, the key is to create a comfortable, efficient environment that suits your coding style. Happy coding!
Frequently Asked Questions (FAQ)
-
Can I use more than one IDE?
Absolutely! It’s not uncommon for programmers to switch between different IDEs depending on the task at hand.
-
I’m a beginner. Which IDE should I use?
Code::Blocks and Eclipse are both beginner-friendly options. They offer a good balance of features and ease of use.
-
I’m having trouble setting up my IDE. What should I do?
Don’t worry, it’s normal to encounter some bumps along the way. Try searching for your issue online – there’s a good chance someone else has faced the same problem and found a solution. If all else fails, don’t hesitate to ask for help in programming communities like StackOverflow.
Related Tutorials
- Mastering C Programming: Dive deeper into the world of C programming with this comprehensive guide.
- Debugging in C: Learn how to find and fix bugs in your C code with this handy tutorial.
- Advanced C Programming Techniques: Ready to take your C programming skills to the next level? This tutorial is for you.
And that’s a wrap! Remember, setting up your IDE is just the first step in your C programming journey. There’s a whole world of coding out there waiting for you. So, what are you waiting for? Get your IDE set up and start coding!